What is a Crop?
A crop is a plant or plant product that is grown and harvested for food, fiber, or other purposes. Farmers cultivate crops in fields and harvest them once they are mature.
Add a Crop
- After successfully creating your season, you will be able to add your Crops.
- Navigate to "Crops":
- Click on “Crops” in the left sidebar.
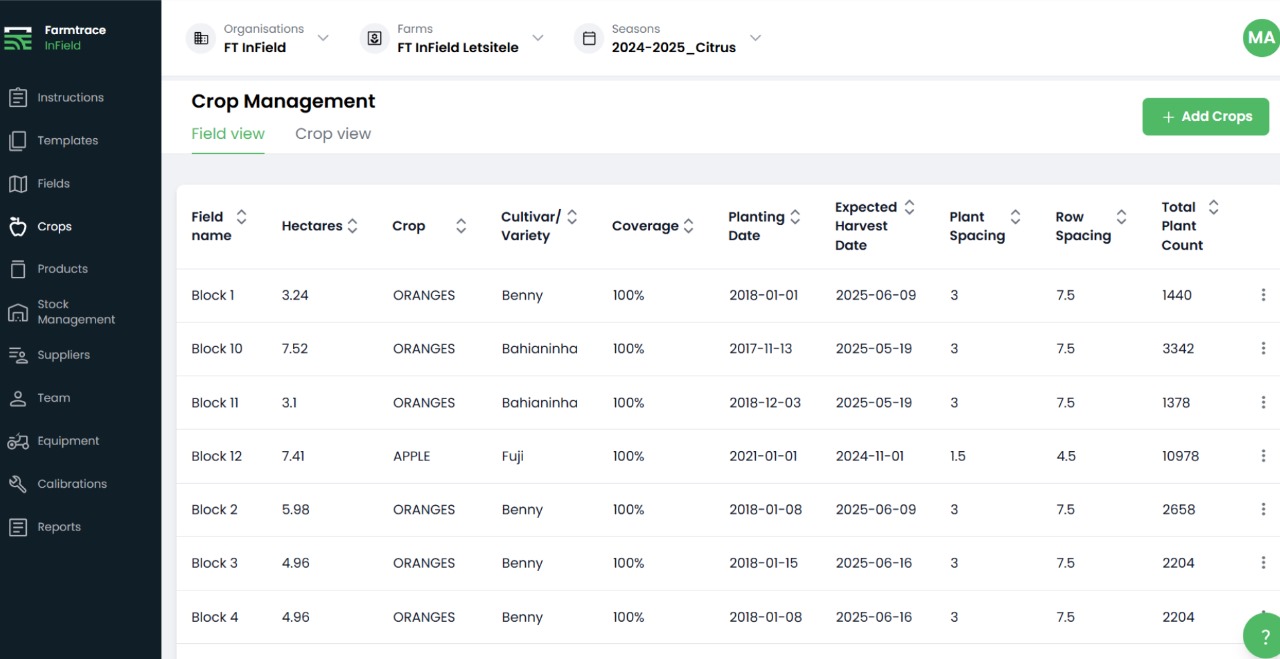
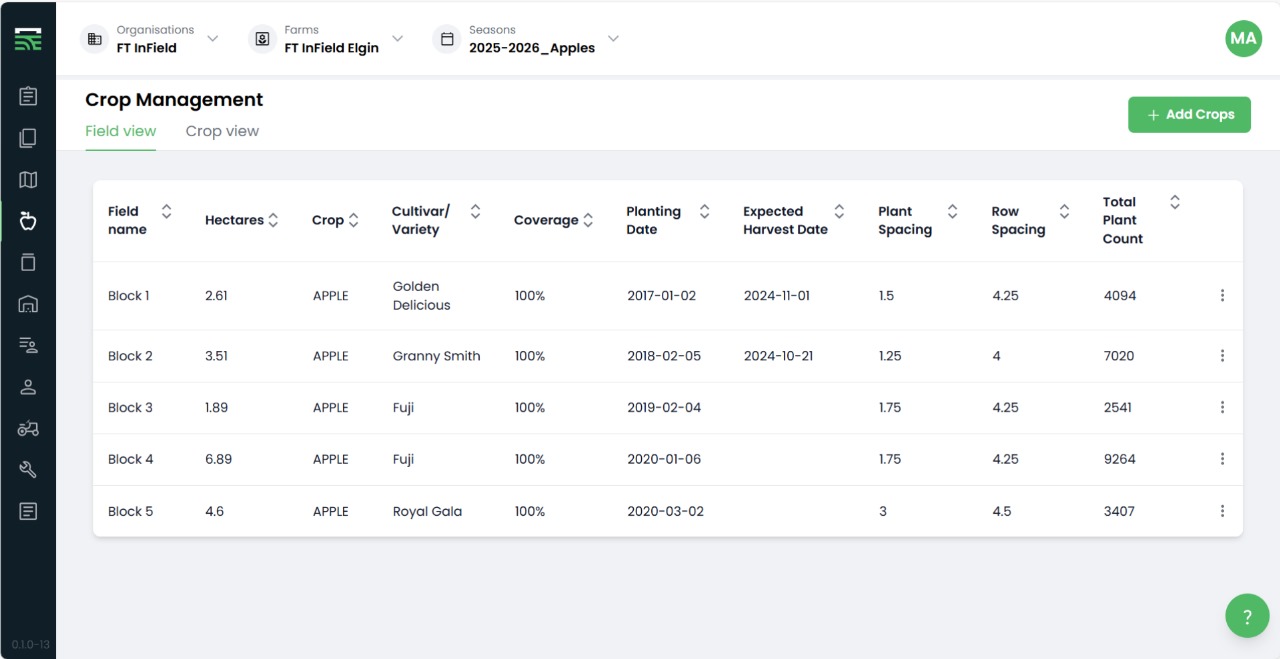
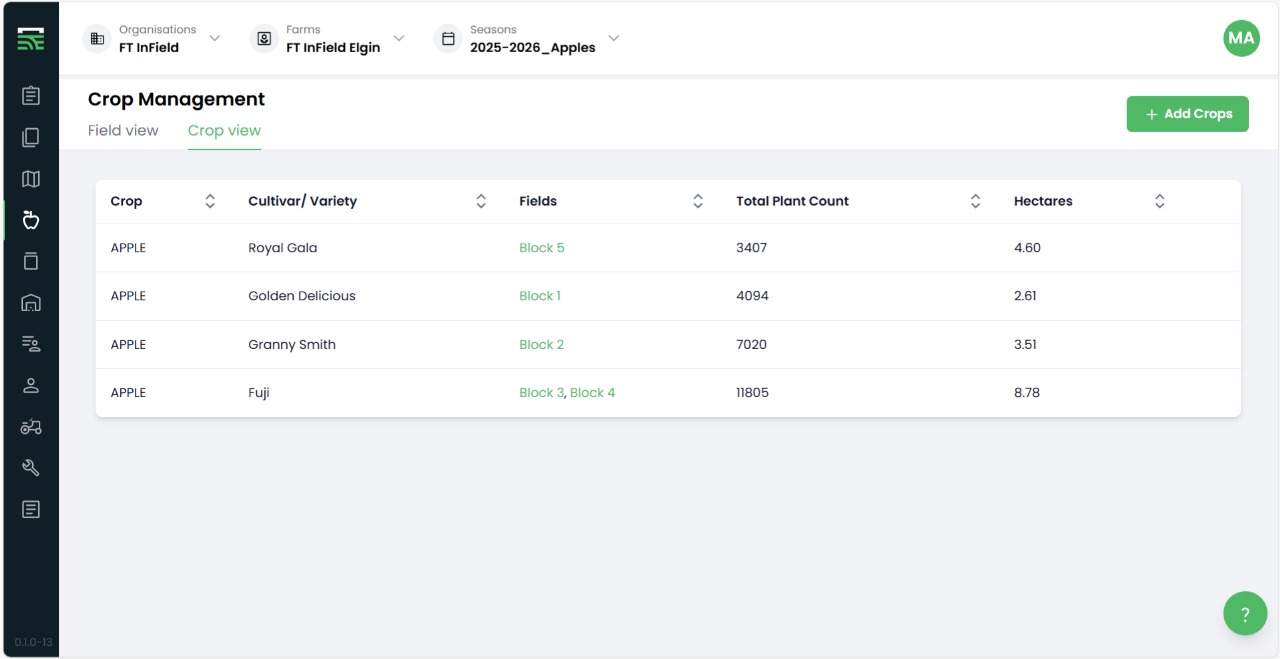
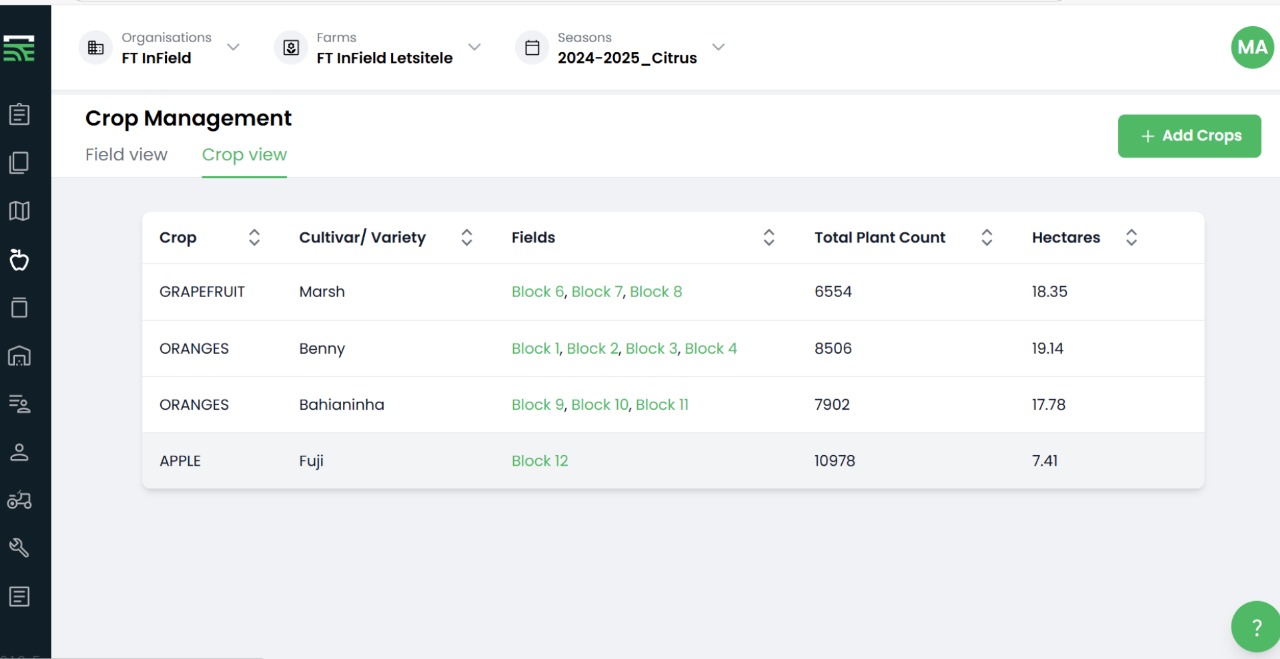
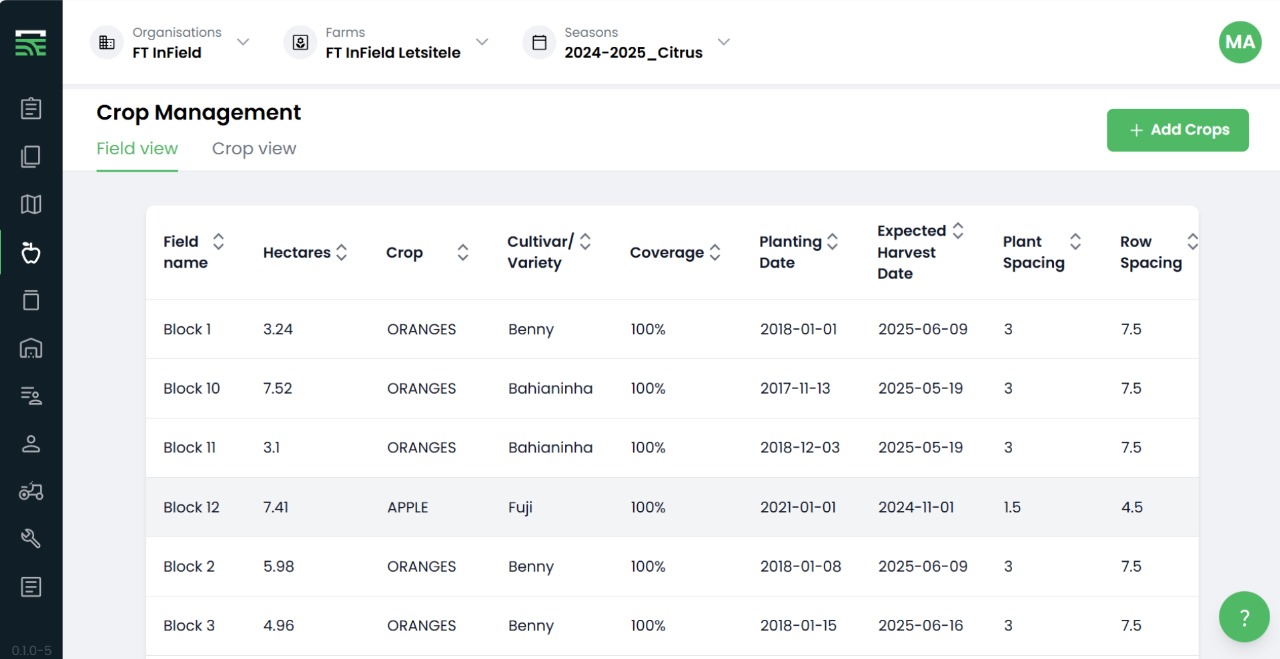
There are two viewing dashboards available
- Field View: This dashboard displays each Fields information individually, including the Crop and Cultivar/Variety related to each specific field.
- Crop View: This dashboard displays each Crop individually, including the Fields on which the specific crop and cultivar/variety is grown.
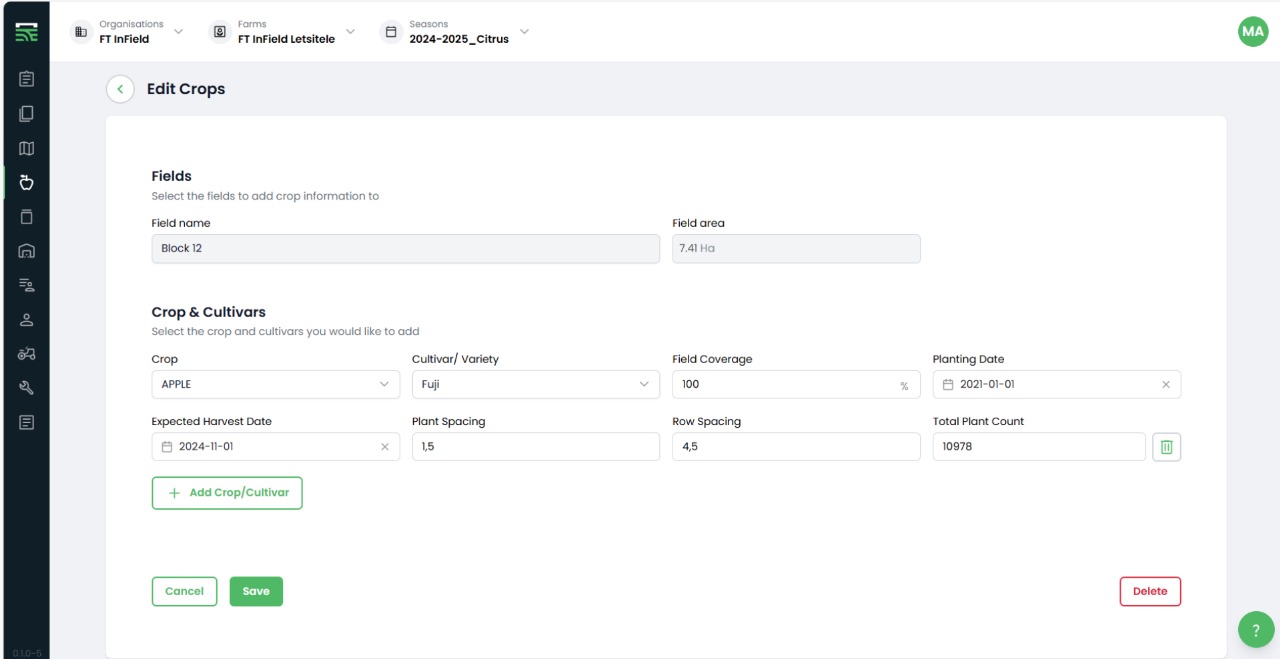
Add a crop from within the crop form:
- To Add a new crop, select the "+ Add Crop" button on the top-right corner.
- Complete the Crop Form.
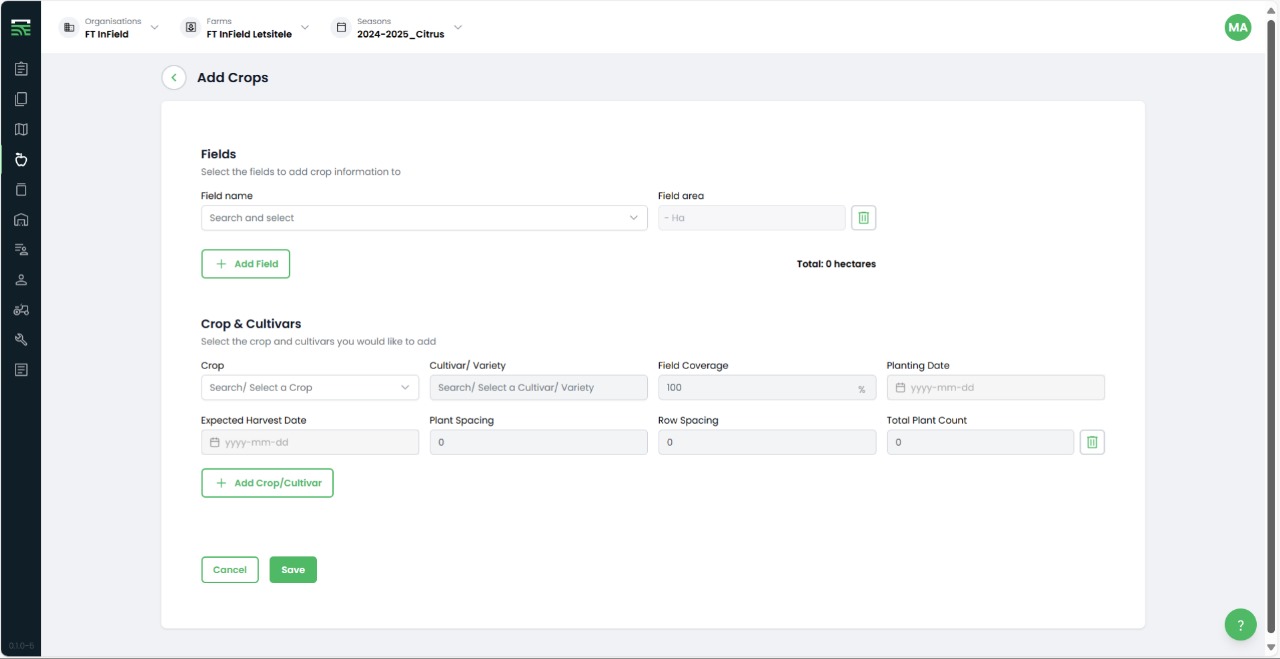
- Select the "Add Field" button and choose the captured field for which the crop is linked.
- InField will automatically generate the hectares.
- If multiple fields have the same crops, select multiple fields.
Select Crop Type:
- From the “Crop” dropdown menu, select the type of crop planted in the field (e.g., FRUIT: CITRUS or APPLE: POME FRUIT).
- From the “Cultivar/Variety” dropdown, choose the cultivar/variety of your crop.
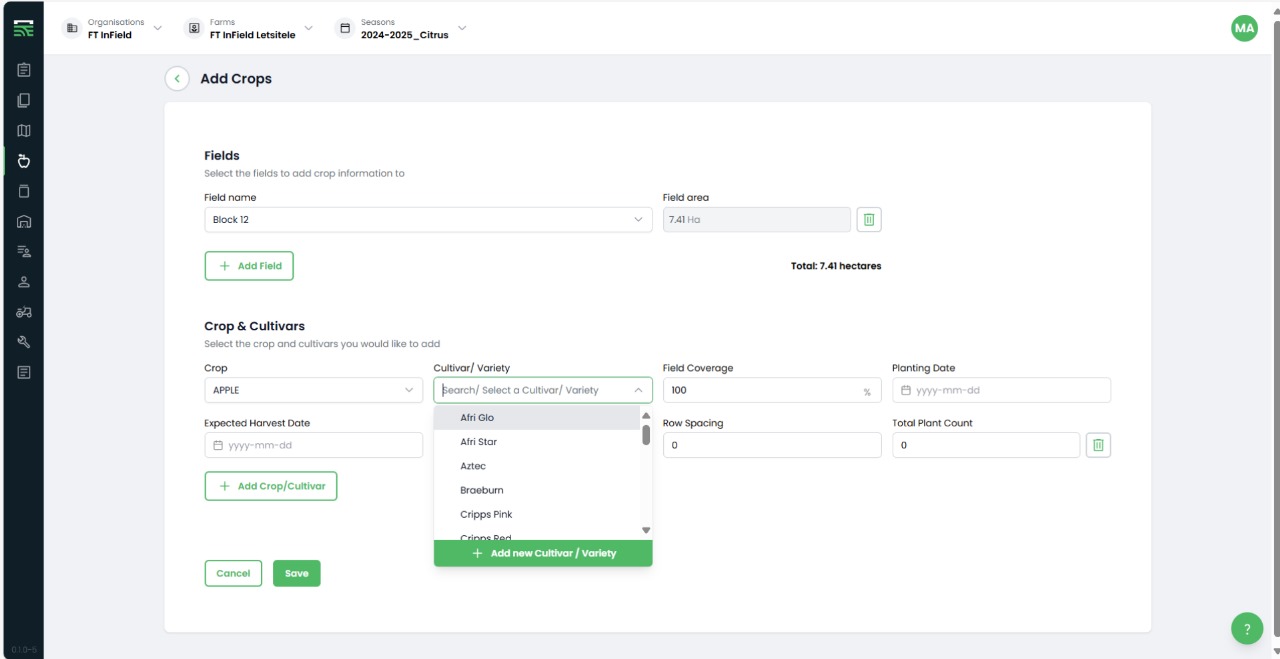
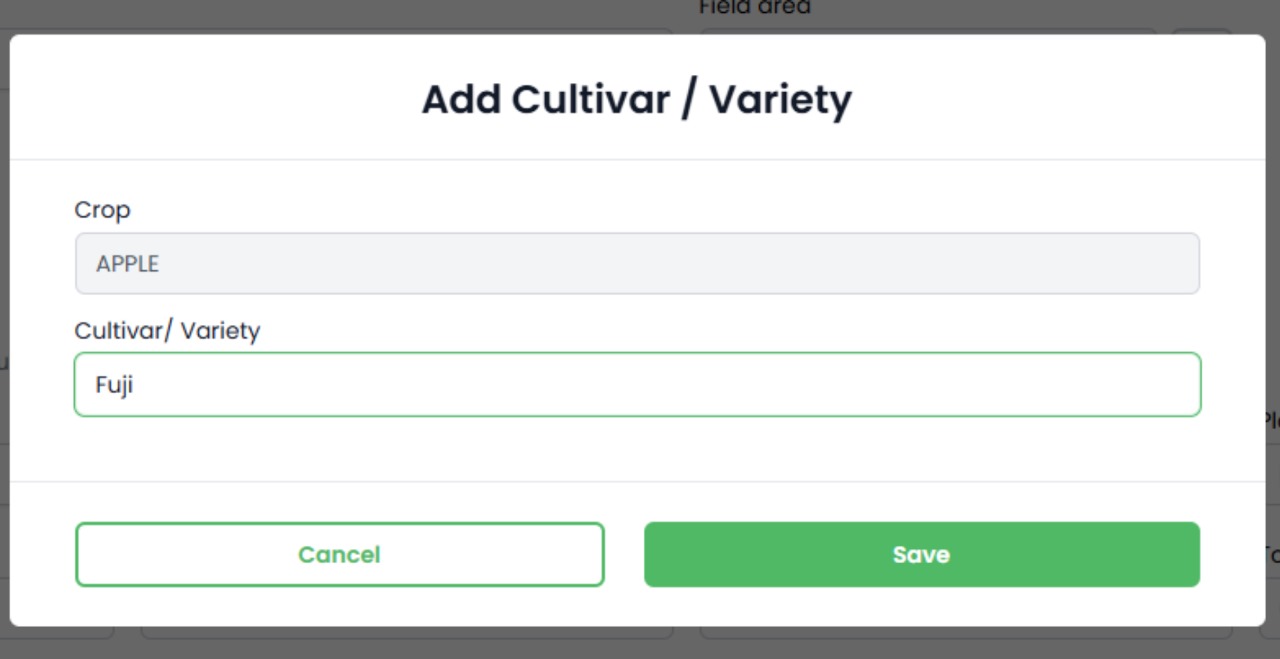
- If you can't find the required cultivar/variety, click “Add New Cultivar/Variety” and fill in the new name.
- Click “Save” to save the new cultivar/variety.
- The newly added cultivar/variety will now be visible in the “Cultivar/Variety” dropdown for future selections.
Additional Crop Details:
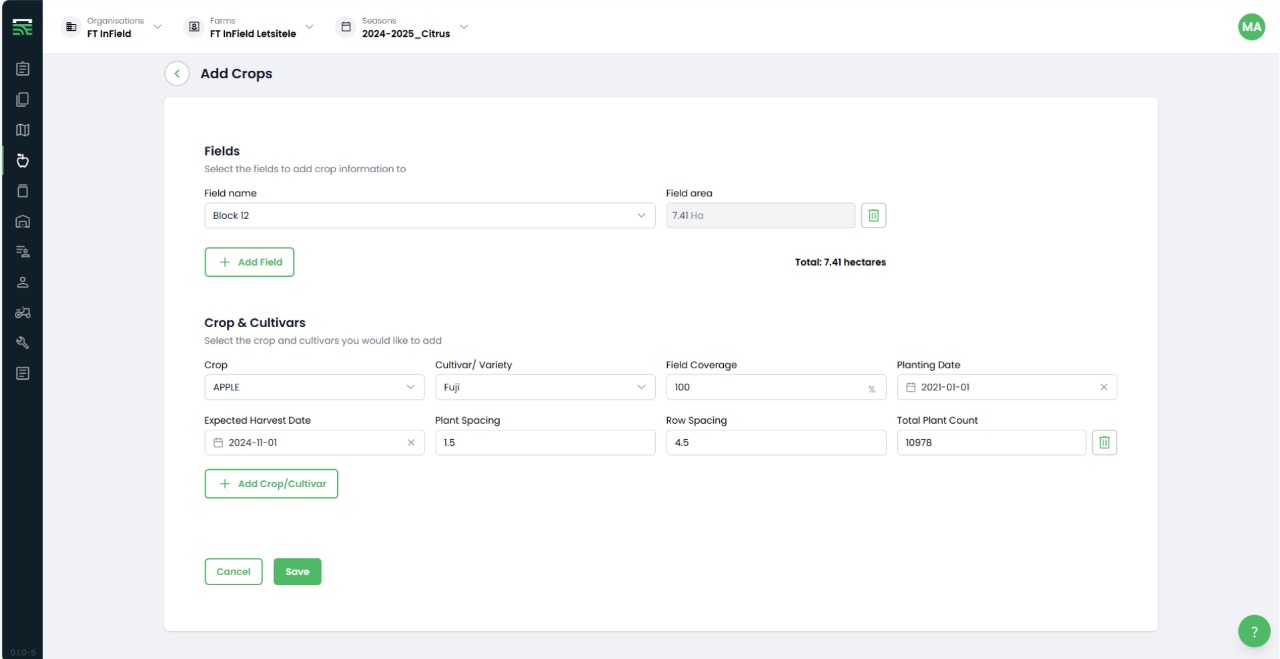
- The Field Coverage column defaults to 100%. This can be edited if the crop only covers a portion of the field.
- Select the Planting Date and Planned Harvest Date from the calendar.
- Fill in the Plant Spacing (in meters) and the Row Spacing, which allows the system to calculate the total plant count.
- If multiple crops are grown, click "Add Crop/Cultivar" and repeat the above steps.
Finalizing the Crop Information:
- Once completed, click the green “Save” button at the bottom of the form.
- The information will be visible in both the Field View and the Crop View.
Edit Crop Information
Access Crop Information:
- Click on the crop or field in the Crop Management Views.
Edit the Form:
- The form will open, allowing you to edit the necessary information.
- Once the updates are made, click “Save.”
- The information will be updated accordingly.
